How to publish your Android app on Google Play App store step by step
 |
| Google Play App Store |
If you have created a new application and are excited to publish it on the Google Play App Store, this article provides you with a practical guide to publish your application on Google Play App Store to be available to users. Think of launching the application at first glance, it may seem a difficult task, but with the following steps, you will be able to publish your application in less than one day :) ...
Before starting...
You must have an APK version of your application, now that you have created your copy of the APK you are ready to start with the following steps..
Step 1: Create a new Developer Account on Google Play App store
Before you publish your app on Google Play you need to create a developer account , you can simply sign up with your existing Google account.
 |
| Google Play App store account |
The registration process is very simple, you need to pay once for the registration of $25, and enter some basic data such as the name of the developer that will appear to users in the Google Play App store. You can later modify this data.
You have to agree to the terms and after completing the payment process, we simply finish the registration process :). To confirm your registration you may wait up to a maximum of 48 hours, usually much shorter time.
Step 2: (Optional) If you intend to monetize your app.
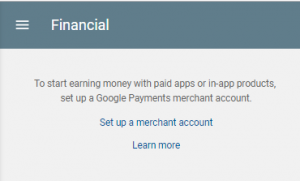
In the event that you want to publish a paid application, or sell within the application, then you must adjust the settings of your payments account in your Merchant Account as follows:
1. Log in with the same email address to your Play Console
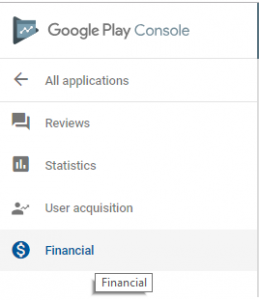
2.From the left menu choose Download Reports, then Financial
3.Now adjust the settings within the Merchant Account as follows by filling in the information, and upon the completion of successfully entering the necessary data about it, the merchant account will be linked to your Google Play account:
 |
| adjust the settings within the Merchant Google Play app store Account |
Setting up a Merchant Account will allow you to manage the sales of the application, view monthly reports, and analyze sales.
Step 3: Create the app (in Google Play App Store)
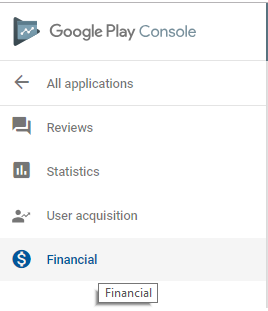
After setting up your account on Google Play, you can now add your applications as follows:
 |
| Google Play |
- Choose the "All applications" tab from the left menu.
- Then click on "Create Application"
- Choose the default language used within your app through the drop-down menu
- Enter your app title (it can be changed later don't worry)
- Finally, press the "Create" button.
Now, after you have successfully created the application on Google Play, you will be directed to the store's page. Where you will fill in the necessary data and details for your application.
Fourth: Preparing the Store Listing
Before you publish your app, you will need to set up the store listing in terms of images, data, and description of the app, which will be visible to users in Google Play. And here you can put preliminary data and then modify it later whenever you want. The important thing is that all modifications are before the final publication process. Below are some of the details that you need to prepare:
4.1 Product details (on Google Play App Store)
You have three fields that you need to fill in here:
 |
| Product details |
The first field: Title - which is the name of the application that will be displayed in Google Play to users, 50 characters maximum.
Second field: short description - A brief description of the application Find that the user usually sees this description before downloading the application, maximum 80 characters.
Third field: Long Description - A full description of your application, max 4000 characters.
4.2 Graphic Assist
Here you will add images of the application, videos of the application, and the icon of the application. Some basic requirements such as screenshots of the application and the image of the main application and icon. The rest of the requirements are optional.
Each image or icon here will have special requirements in terms of size and type shown in the same field.
 |
| Google Play app store |
4.3 Languages and translation
Here the settings are optional. Where you can add a translation for the description of the program, or a translation of the images and screenshots of the application as shown in the following image.
 |
| settings |
4.4 Categorization
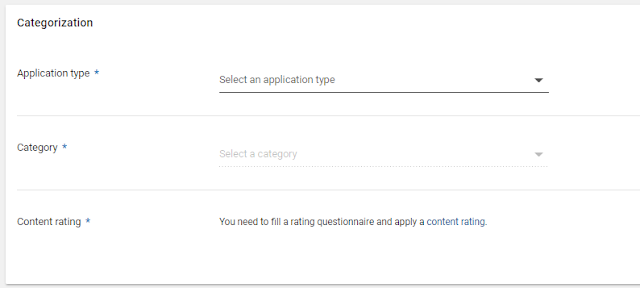
In this section, you will initially specify the category to which your application belongs, either Application or Game, then select one of the options from the drop-down list such as Art or Education. As for the Rating option, you must first upload the APK file of your application. It will be explained later.
 |
| upload the APK file to Google Play |
4.5 Contact details
Here, in this section, simply specify the information that you would like to appear to users in the store to facilitate communication with you, your personal site and e-mail. The email is required and cannot be left blank.
 |
| Contact details |
4.6 Privacy policy
Some applications need access to user data or different permissions that the user must agree to before downloading the application. Here this will be specified in the privacy policy.
Now you are done with the Store Listing settings, now go to the Save Draft buttons so that the details you added will be saved. You can go back and modify some details before publishing the application, so do not worry if you are hesitant about the validity of some of the data you entered.
Fifth: Upload the APK file to the app release on Google Play App Store
After preparing all the necessary requirements, it remains only to upload the application as an APK file (Android Package Kit), of course the APK file contains all the elements that the application needs to run on the client's device.
The first step before uploading the app is to create an app release . To do this, choose the application you created in step 3 . Then from the left menu >> Realease management and then App release.
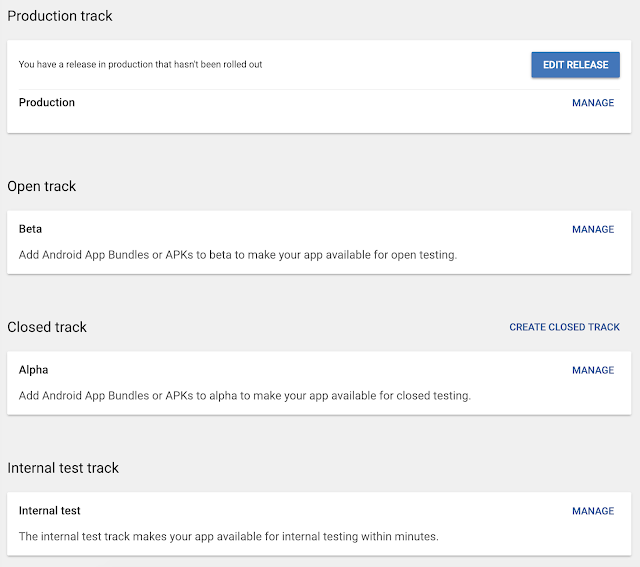
Here, you must choose the release type to which you want to upload the application. The options are:
- Production release
- Open track
- Closed track
- Internal track test
 |
| Google Play App Store |
Options 2-3-4 allow you to test the application by selecting a custom group of users to try the application before it is public. These are great and safe options that allow you to detect some errors and test the application on a specific category of users.
Finally, option 1 is production release when you want to upload the application to be available to everyone on the store.
In any case, under each of these four options you will find a full explanation of them, now all you have to do after making your choice is to click on Manage and then from the next window Create Release,
then follow the rest of the instructions on the screen for adding the APK file in addition to putting a name and description for the version you will be releasing.
 |
| production release |
Finally after completing all the entries, click on Save. until the changes are saved.
Sixth: Adjust the Content Rating settings
This step is necessary, as not registering to rate your application will make it under the " Unrated " list , which Google play may delete later. Ok, to rate the application, you must fill in the questions related to the rating.
Where can these questions be accessed and prepared?
From the left menu store presence, then choose content rating.
Then fill in the options, you must take into account the accuracy in this, as it helps you reach your audience and protect it from deletion by the Google Play administration.
Seventh: Application Pricing on Google Play Store $$
Before starting this step, you should decide whether your app is free or not.
Remember, you can later convert from paid to free and you cannot do the opposite from free to paid.
This is done through the left menu by selecting pricing and distribution.
Eighth: Publish the application to Google Play App Store :)
After taking a look at all the settings and reviewing what you have entered well, the last step is to publish the application.
The following important sections that you should make sure that there is a green tick next to them stating that they have been successfully completed are:
- store listing
- content rating
- pricing and distribution
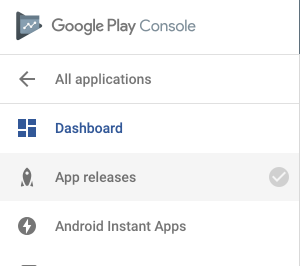
Now choose your application by clicking on the name of the application, then go to app release and then click on edit release until you review the application.
 |
| Google Play app store |
Next step: Click on review , which will take you to the Review and rollout release window , here you will find if you have any notes or alerts if you forget something.
Finally: Choose to press Confirm rollout to publish the application on Google Play. :)
Congratulations..
If the previous steps were applied correctly, your application in less than 4 hours will be officially published..
What then ???
After publishing the application, the most difficult task begins with you, which is marketing the application to reach the largest number of users.
Then follow up the users' opinions and evaluations to upgrade the application level and make updates all necessary.
I also advise you to use the Crashlytics tool to follow up and analyze downloads and receive alerts immediately if any error occurs in the users' devices, in fact it is a wonderful tool that I benefited a lot from in following up the progress of my application. I will write a blog post about it later.
Finally, share with us your experiences and tips under this article, which I hope you will benefit from.
read also :


Comments
Post a Comment